
Interior Lighting | VRaySun, Dome VRayLight & VRayHDRI
- Margarita Nikita

- Dec 3, 2020
- 7 min read
Updated: Nov 20, 2024
Lighting in 3ds Max follows the same rules as lighting in real life. In this post we will describe how you can set up the natural lighting in your scenes using the VRaySun and the Dome VRayLight.
More of a visual learner? Dive into the YouTube video!
Lighting in 3ds Max follows the same rules as lighting in real life. In this post we will describe how you can set up the natural lighting in your scenes using the VRaySun and the Dome VRayLight.
Open the file Natural Light.max.
If we hit the Render button, we will get the image you see below, a dark render and the scene get’s only illuminated by the background image.
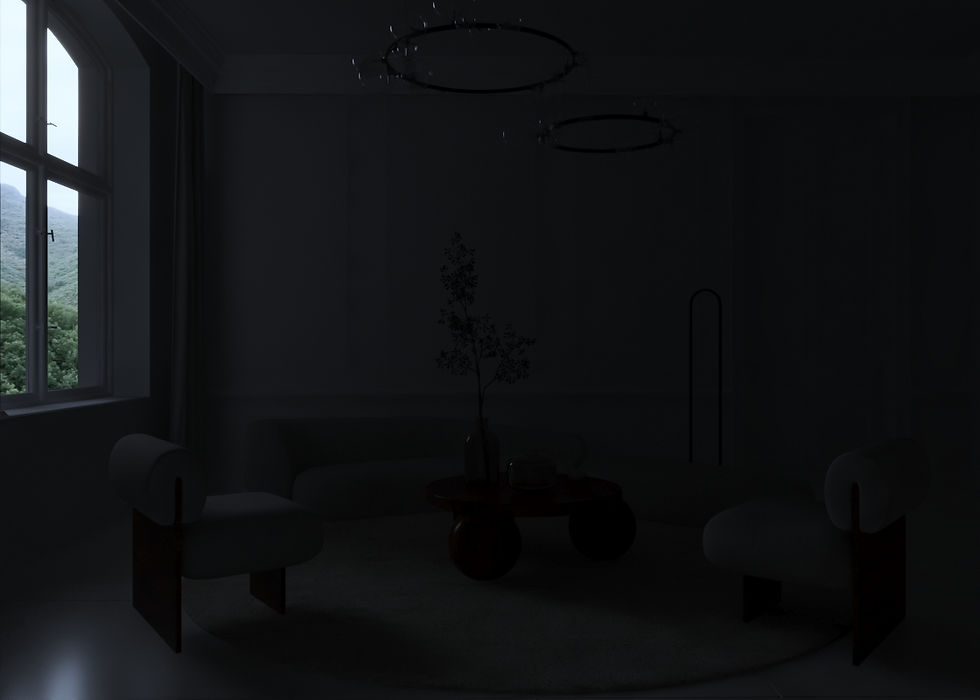
This happens because for the background I have assigned a VRayLightMtl, so it’s a material that casts light.
If we didn’t have the background, then our viewport would render black.
So in order to produce a render, we need to have at least one light source in the scene.
VRaySun
To create a VRaySun, go to the Command Panel, click on the Create tab, , and then choose, Lights . Click on the Photometric drop-down list and select VRay. Then click on VRaySun.

Go to the Top view, click and drag to place the sun, and where you’ll leave it, the sun target is placed.

In the V-Ray Sun window select Yes. This way V-Ray automatically places an environment, VRaySky. VRaySky works together with VRaySun and they simulate real-life lighting. So, by changing the position of the sun, the sky also changes.

Anything we create in 3ds Max it is placed at height 0cm. So, if we go to the Front view and check where VRaySun is, we will see that it is at the same level as the floor. So, the next step is to elevate it.
Enable the Select & Move command, select the VRaySun and click on the y axis, the green arrow and drag it higher, at approximately 400cm.
When moving an object, we can check the Coordinate Display area in the Status bar or type there directly the desired value.


Since we now have a light source in the scene, we can produce a render. Press Shift and Q.
We get the render you see below.

What we need to be careful of is, that when we use planes/boxes to apply the view on, as I have done in this case, then those planes, might block the sun from entering accurately. So, what we always do is to select then VRaySun, go to its properties in the Modify tab, go to the Options rollout and click on the Exclude button.

On the left list you see all the layers / objects of the scene. Select the background and move it to the right list.

The background is now excluded from the VRaySun, which means that the sun will act like it does not exist.
Let’s render one more time. So now we are sure that the sun enters the room without meeting any obstacles.
I won’t explain in this post how to use the V-Ray Frame Buffer, but I will upload soon a post dedicated to the VFB. For now, just go to Layers, click on Add Layer and choose Exposure. Go to its Properties and set the Highlight Burn value to 0.15.


After adjusting the Highlight Burn value, the render no longer gets burnt.
VRaySun parameters
As we mentioned at the beginning of this post, V-Ray simulates how sun works in real life. Which means that the higher we place the sun the stronger the light will be and whiter. While the lower the sun, the softer the light and warmer.
Let’s apply all these in our exercise.
Enable the Select & Move command, select the VRaySun, go to the Z fields at the coordinates of the Status Bar and type 800cm. Hit Render.

What we see now is that, apart from the shadows that changed direction, the sun got stronger and whiter. Moreover the shadows got sharper.
Move the sun position to z = 180cm and produce a new render.

The sunlight got warmer and more subtle.
If we want to increase or decrease the intensity of the sunlight, go to the Sun Parameters rollout, and play with the Intensity multiplier.

If we want the shadows to be less sharp, we need to go to the Size multiplier in the Sun parameters rollout and increase the Size value. The default value is 1, let’s try 7 and render.

You see how smooth they are now.
So, this is how we place and adjust the VRaySun and now let’s explore the Dome VRayLight.
VRay Dome Light
First, we will disable the VRaySun. Select it, go to its properties and in the Sun Parameters rollout uncheck the Enabled field.

If we produce a render, we will see that our interior is still illuminated. This happens because when we placed the VRaySun the VRaySky was placed along and VRaySky reinforces the lighting of the scene.

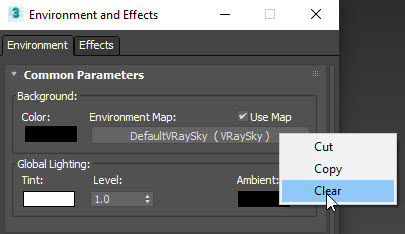
Go to the menu Rendering – Environment. In the Commons Parameter rollout right click on the VRaySky and select Clear to delete it.
For now, let’s also select the background plane and hide it. So, select it, right click and choose Hide Selection.

If we do one more render, everything will be black, since there is not a single light source in the scene.
To create a Dome VRayLight, go to the Command Panel, click on the Create tab, choose Lights - VRay - VRayLight.

Go to the General rollout and from the Type click on Plane and choose Dome.

Go to the Top view and click anywhere to place the Dome light. It makes no difference where we will place it.

If we render, we will get the below result.

To make the interior brighter, select the Dome light, go to its properties and increase the Multiplier. Instead of 1, type 10 and re-render.


So, what’s mainly the difference when using a VRaySun and a Dome VRayLight?
When we use the VRaySun we have more defined shadows, we can select where the sun will be and where its target will be placed and so the sunlight has a specific direction. When we use a Dome VRayLight, we basically set a diffuse lighting in the scene.
When placing a Dome VRayLight, we can use it in combination with an HDRI.
What is an HDRI image? It is a 360 photo that contains a large amount of data which can be used to emit light into the scene.
You can find many HDRIs on the web, a website I could suggest to you that offers free HDRIs is hdrihaven.com.
Visit the site, go to the HDRIs menu and select one of the skies. I chose the "Abandoned Hopper Terminal 04" and downloaded the 4K resolution HDRI.


Go back to the 3ds Max file. To load an HDRI, go to the DomeVRayLight parameters, to the General rollout and click on the No Map button.

Choose Maps – Vray – VrayBitmap. If you have a previous version of V-Ray 5, then you need to choose VRayHDRI. If you have VRay 5, then choose VRayBitmap and click OK.

Choose the HDRI we downloaded.

If we hit Render, we will get the below image.

So now, we have a view outside the window, the view that was seen in the HDRI preview and we also have sunlight and shadows casted from the HDRI in our scene.
To see the HDRI outside the window in the camera viewport, we need to click on the Default Shading button next to the camera viewport's name, go to Viewport Background and make sure Environment Background is enabled.

Then go to the menu Rendering – Environment and to the Common parameters rollout and drag and drop the HDRI in the Environment map. Choose Instance.

Now the HDRI is visible in the viewport outside the window.

How can we adjust the HDRI?
If we take a close look at the DomeVRayLight, you see a line, a pointer.

This line indicates where the center of the HDRI image is. If you see the HDRIs the sun is usually placed at their center. So, this pointer indicates the position of the sun.
To rotate the HDRI, and so the position of the sun, we need to open first the Material Editor, drag in the VRayHDRI and create an Instance.

Double click on the VRayBitmap to open its parameters. To rotate the HDRI, go to the Horiz. rotation and play around with this value. We can see real time in the viewport how the background rotates. Try 50 and render.

The image below shows how the shadows and lighting changed.

Let’s try 100 and do one more test. Now, we get a different lighting result.

To understand where the sun is located, we said that the line on the Dome indicates the center of the photo/sun and is the 0 degrees. I also mark where are the 90, 180 and 270 degrees for your reference.

So, when we typed 50, it’s like we moved the sun approximately where shown below.

If we want the render to be brighter, go to the Processing section and increase the Overall mult. Type 5 and render.

If this is an actual project and your client sends you a specific view to place outside the windows, you can still use the VRayDomeLight and the HDRI, but then you need to make a plane to put outside the windows to apply your view as a material.
I have already created a Plane for this project, so right click and choose Unhide All.
What we should never forget is, when we make planes to put the view on, to always select the light source, go to the Options rollout and click on Exclude button and select the plane. This way it won’t block the light from entering.
So, if we now render, we are using the DomeVRayLight, the HDRI and we have the view we want outside the windows.

To sum up, in this post we explored 2 different ways to naturally light our scene, either using the VRaySun or the VRayDomeLight. Regarding the VRayDomeLight we can either use it in its default form and light the scene uniformly or add an HDRI.
Thank you for reading, I will see you all in my next post!


Thank you, it is clear and simple to understand both ways
This is so so helpful, thank you. I recently did your course on Udemy and I can't tell you how fantastic it is, it has helped me so much. And having this post to refer to afterwards came in really handy.
A render settings blog post would be amazing too - your course more than covers this, I just find a written version very handy to have to refer to when I'm putting things into practice :)
Thank you so much for sharing your amazing talents!
Thanks, really nice.....and easily understandable..🙂
THANK YOU ITS VERY HELPFUL😊
thank you so much you are the best